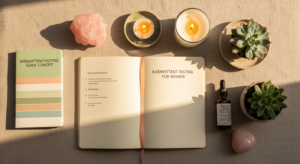
Why an At-Home Facial is Your New Self-Care Ritual
The concept of a facial often conjures images of serene spa environments, soft music, and expert hands. While professional treatments are undeniably beneficial, the truth is that a significant portion of that pampering and efficacy can be replicated and even personalized within the comfort of your own home. Embracing the at-home facial isn’t merely about saving time or money; it’s about cultivating a deeper connection with your skin, understanding its unique needs, and integrating a powerful self-care practice into your routine.
Firstly, the financial aspect cannot be overlooked. Regular professional facials can accumulate a substantial cost over time. By learning how to perform an effective facial at home, you gain access to consistent, high-quality skincare without the recurring expense. This allows you to invest in better quality products that will last longer and serve multiple treatments, ultimately providing more value.
Secondly, convenience is paramount. Life for the modern woman is a delicate balance of career, family, and personal aspirations. Finding a slot in your busy schedule for a spa appointment can be challenging. An at-home facial offers unparalleled flexibility; you can perform it whenever you have a quiet moment, be it a Sunday afternoon, a weekday evening, or even a quick refresh before a special event. This adaptability ensures that self-care doesn’t become another item on a stressful to-do list but a fluid, enjoyable part of your life.
Beyond the practicalities, there’s a profound empowerment that comes with understanding your skin and taking an active role in its health. When you select each product, apply each step with intention, and observe your skin’s response, you become an expert in your own unique canvas. This knowledge is invaluable, helping you make informed decisions about product ingredients, address specific concerns, and adapt your routine as your skin evolves through different seasons or life stages. It moves beyond passive consumption of beauty products to an active, engaged relationship with your skin’s vitality.
Moreover, the ritual itself is a powerful stress reliever. In a world that constantly demands our attention, dedicating an hour or so solely to ourselves, away from screens and distractions, is a profound act of mindfulness. The sensory experience – the warmth of steam, the soothing scent of a mask, the gentle touch of your hands – creates a meditative state that calms the nervous system and promotes overall well-being. This isn’t just about glowing skin; it’s about achieving a radiant inner calm, which is just as vital for holistic health. Much like creating a harmonious living space, understanding the “home renovation dos and don’ts” applies to our personal care rituals. By setting up a dedicated, clean, and inviting space for your at-home facial, you enhance the experience and make it a sustainable habit.
Finally, consistency is key to achieving and maintaining healthy, vibrant skin. An at-home facial allows for more frequent treatments than professional ones, enabling you to address concerns like hydration, exfoliation, and brightening on a regular basis. This consistent attention can lead to noticeable improvements in skin texture, tone, and overall radiance, making your skin resilient and healthy in the long run. By integrating this ritual, you are not just treating your skin; you are investing in your overall health and confidence, an investment that pays dividends in how you feel and present yourself to the world every single day.
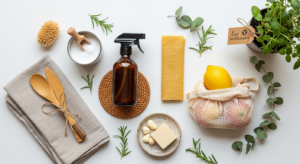
Essential Tools and Ingredients for Your DIY Spa Day

Before you embark on your journey to radiant skin, it’s crucial to gather the right arsenal of tools and ingredients. Think of this as preparing your personal skincare laboratory, ensuring you have everything at your fingertips to create a seamless and effective experience. Quality over quantity is key here; investing in a few good products tailored to your skin type will yield far better results than a cabinet full of mismatched items.
Let’s start with the basics, moving through the typical steps of a facial:
- Gentle Cleanser: You’ll ideally want two types for a proper double cleanse. First, an oil-based cleanser (balm or oil) to dissolve makeup, SPF, and environmental impurities without stripping your skin. Second, a water-based cleanser (gel, cream, or foam) to thoroughly clean your pores and remove any remaining residue. Choose formulas that are gentle and pH-balanced.
- Steamer or Hot Towel: This is a crucial step for opening pores and preparing your skin for subsequent treatments. A dedicated facial steamer is a fantastic investment, providing a consistent, gentle mist. Alternatively, a bowl of hot water and a clean towel can achieve a similar effect safely and effectively.
- Exfoliant: This comes in two main categories:
- Physical Exfoliant: Opt for a very fine-grained scrub, enzymatic exfoliant, or gommage that gently buffs away dead skin cells without causing micro-tears. Avoid harsh, abrasive scrubs.
- Chemical Exfoliant: AHAs (alpha hydroxy acids like glycolic or lactic acid) or BHAs (beta hydroxy acids like salicylic acid) are excellent for chemical exfoliation. They dissolve the bonds between dead skin cells, revealing brighter skin. Choose a mild formulation, especially if you are new to chemical exfoliants.
- Face Mask: This is where you can truly customize your treatment.
- Clay Mask: Ideal for oily or acne-prone skin, drawing out impurities and minimizing pores.
- Hydrating Mask: Perfect for dry or dehydrated skin, often containing hyaluronic acid, ceramides, or glycerin.
- Sheet Mask: Convenient and delivers a concentrated dose of serum for various concerns (brightening, calming, anti-aging).
- Cream Mask: Offers rich nourishment and hydration, great for mature or very dry skin.
- Toner: A hydrating or balancing toner helps to restore your skin’s pH after cleansing and prepares it to better absorb subsequent products. Look for alcohol-free formulations with ingredients like rosewater, witch hazel (alcohol-free), or hyaluronic acid.
- Serum: A potent treatment step. Choose a serum that targets your specific concerns: Vitamin C for brightening, hyaluronic acid for hydration, niacinamide for pore refinement and barrier support, or peptides for anti-aging.
- Moisturizer: The final step to lock in all the goodness. Select a moisturizer appropriate for your skin type – lighter lotions for oily skin, richer creams for dry or mature skin.
- Eye Cream: The delicate skin around the eyes requires specialized care. A good eye cream can address concerns like fine lines, dark circles, and puffiness.
- Sun Protection (SPF): If you are performing your facial during the day, a broad-spectrum SPF of 30 or higher is non-negotiable as the very last step. Exfoliation can make your skin more sensitive to the sun.
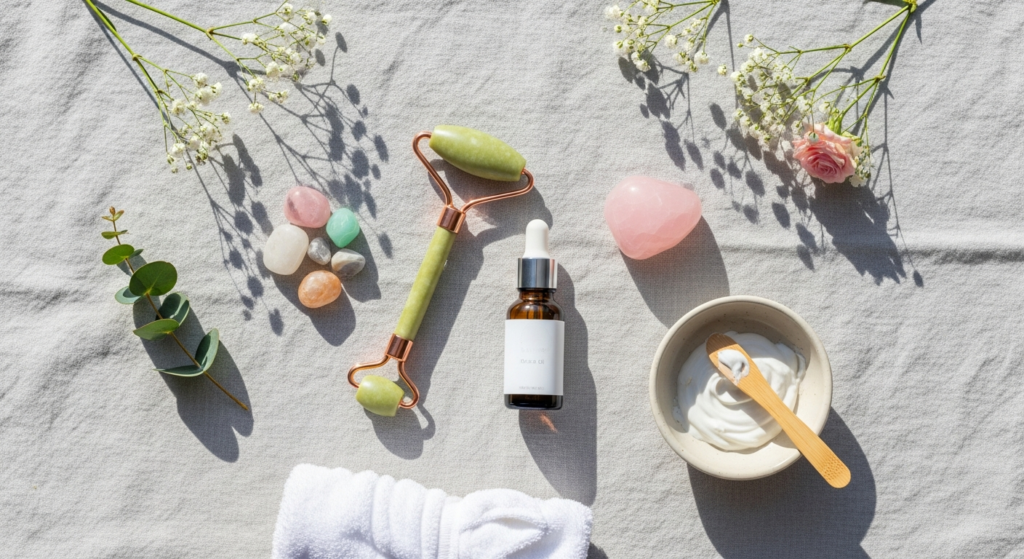
Beyond the products, a few essential tools will elevate your experience:
- Soft Headband or Hair Tie: To keep hair away from your face.
- Clean, Soft Towels: Several small, plush towels for patting dry and warm compresses.
- Cotton Pads or Rounds: For applying toner or removing masks.
- Small Bowls: For mixing masks or holding warm water.
- Optional but Recommended:
- Facial Brush or Sponge: For gentle cleansing.
- Facial Roller or Gua Sha Tool: To promote lymphatic drainage and product absorption, adding a luxurious massage element.
- Diffuser with Essential Oils: For aromatherapy to enhance relaxation (e.g., lavender, chamomile).
- Gentle Extraction Tools: ONLY if you are experienced and know how to use them without damaging your skin. For most, this step is best left to professionals.
Remember to always check the expiration dates of your products and store them properly to maintain their efficacy. By assembling these essentials, you’re not just preparing for a facial; you’re creating a personalized beauty retreat that promises rejuvenation and visible results.
Step-by-Step Guide to Your Ultimate At-Home Facial
Step 1: Set the Ambiance and Prepare Your Space
Before you even touch your face, create a serene environment. Dim the lights, put on some calming music, light a candle (if safe), or diffuse essential oils like lavender or eucalyptus. Ensure your bathroom or chosen space is tidy and clutter-free. Just as you would consider “home renovation dos and don’ts” to create a functional and beautiful living space, apply the same principle to your self-care zone. A clean, organized environment enhances relaxation and focus.
Step 2: Double Cleanse (5-7 minutes)
This is the foundation of any good facial.
- Oil-Based Cleanse: Apply an oil cleanser or balm to dry skin. Gently massage it in circular motions all over your face, including your eye area, for about 60 seconds. This dissolves makeup, sunscreen, and sebum. Rinse thoroughly with warm water or remove with a warm, damp cloth.
- Water-Based Cleanse: Follow with your chosen gel, cream, or foam cleanser. Lather it with water and massage onto damp skin for another 60 seconds. This removes any remaining impurities and cleanses your pores more deeply. Rinse well and gently pat your face dry with a clean, soft towel.
Step 3: Steam (5-10 minutes)
Steaming helps to open up your pores, making it easier for subsequent products to penetrate and for impurities to be released.
- With a Facial Steamer: Position your face comfortably over the steamer, following the device’s instructions.
- With a Hot Towel/Bowl: Fill a large bowl with hot (but not scalding) water. You can add a few drops of skin-safe essential oils like tea tree (for oily skin) or lavender (for all skin types, for relaxation). Drape a large towel over your head, creating a tent over the bowl, and lean your face 8-12 inches away from the water. Breathe deeply and enjoy the warmth.
Do not steam for too long, especially if you have sensitive or rosacea-prone skin.
Step 4: Exfoliate (2-5 minutes)
- Physical Exfoliant: If using a gentle scrub or gommage, apply a small amount to damp skin and massage in very light, circular motions, avoiding the delicate eye area. Be incredibly gentle; the goal is not to scrub harshly. Rinse thoroughly.
- Chemical Exfoliant: If using an AHA/BHA product (like a mild peel or exfoliating toner), apply it according to the product instructions. Often, you’ll apply it to dry skin and leave it on for a specified time before rinsing or neutralizing. Always patch test new chemical exfoliants.
Limit exfoliation to 1-2 times a week to avoid over-exfoliating, which can damage your skin barrier.
Step 5: Apply a Face Mask (10-20 minutes)
This is often the most relaxing part of the facial, allowing targeted ingredients to work their magic.
- Apply your chosen mask evenly to your face, avoiding the eye and lip areas. Use a clean brush or your fingertips.
- Lie back, close your eyes, and relax. This is a perfect time to practice mindfulness, listen to calming music, or simply enjoy the quiet.
- Follow the product’s recommended leave-on time. Never let a clay mask dry out completely, as this can dehydrate your skin. Spritz with water if needed.
- Rinse the mask off thoroughly with lukewarm water, ensuring no residue remains. Use a soft, damp cloth for stubborn areas. Gently pat your face dry.
Step 6: Tone (1 minute)
Toning helps to rebalance your skin’s pH and prepare it for deeper product absorption.
- Apply a few drops of your chosen alcohol-free toner onto a cotton pad or directly into your clean hands.
- Gently sweep or pat it over your entire face and neck.
Step 7: Apply Serum(s) (1-2 minutes)
Serums are concentrated treatments that target specific skin concerns.
- Dispense 2-4 drops of your chosen serum(s) onto your fingertips.
- Gently press or pat the serum onto your face and neck until absorbed. If using multiple serums, apply them from thinnest to thickest consistency, allowing each to absorb for a moment before applying the next.
Step 8: Moisturize (1-2 minutes)
Lock in all the beneficial ingredients and provide essential hydration.
- Take a pea-sized amount of your moisturizer and warm it between your fingertips.
- Gently massage it onto your face and neck in upward strokes until fully absorbed.
Step 9: Eye Cream (30 seconds)
The delicate skin around your eyes needs specialized hydration and care.
- Dab a tiny amount of eye cream (about the size of a grain of rice for both eyes) onto your ring finger.
- Gently pat it around the orbital bone (the bone surrounding your eye), avoiding direct contact with the lash line.
Step 10: SPF (Daytime Only)
If you perform your facial during the day, this final step is non-negotiable.
- Apply a broad-spectrum sunscreen with an SPF of 30 or higher generously to your face and neck. Exfoliated skin is more vulnerable to sun damage.
Congratulations! You’ve completed your ultimate at-home facial. Take a moment to appreciate your glowing, refreshed skin and the calm you’ve cultivated. Regular practice of this ritual will not only enhance your skin’s health but also become a cherished part of your holistic well-being.
Tailoring Your Facial for Different Skin Types

One of the greatest advantages of an at-home facial is the ability to customize every step to meet your skin’s specific needs. Understanding your skin type and concerns is paramount to selecting the right products and techniques for optimal results. What works wonders for oily skin might irritate dry skin, and sensitive skin requires an entirely different approach. Let’s explore how to tailor your DIY spa experience.
Oily and Acne-Prone Skin
If your skin tends to be shiny, prone to breakouts, and has enlarged pores, your facial should focus on purification, oil control, and gentle exfoliation to prevent clogged pores.
- Cleanser: Opt for a salicylic acid (BHA) cleanser to help decongest pores, or a gentle foaming cleanser.
- Steam: Beneficial for softening sebum, but ensure your steaming session is not too long or intense, as excessive heat can sometimes stimulate oil production.
- Exfoliant: A BHA-based chemical exfoliant (like salicylic acid) is excellent for penetrating oil and clearing pores. Alternatively, a very gentle physical scrub with fine particles can be used sparingly.
- Mask: Clay masks (bentonite, kaolin) are your best friend. They draw out impurities, absorb excess oil, and minimize the appearance of pores. Sulfur masks can also be beneficial for active breakouts.
- Toner: A balancing toner with witch hazel (alcohol-free) or niacinamide to help regulate oil and reduce inflammation.
- Serum: Look for serums with niacinamide, zinc, or salicylic acid to target oil production and breakouts.
- Moisturizer: Choose a lightweight, oil-free, non-comedogenic gel or lotion to hydrate without adding greasiness.
Dry and Dehydrated Skin
Dry skin often feels tight, flaky, and may appear dull, while dehydrated skin lacks water and can show fine lines. Your facial should prioritize deep hydration, nourishment, and barrier repair.
- Cleanser: A creamy, hydrating, and non-foaming cleanser that won’t strip natural oils. Avoid harsh sulfates.
- Steam: Gentle steaming is fine, but keep it brief to prevent further dehydration.
- Exfoliant: Opt for very gentle enzymatic exfoliants or AHAs like lactic acid, which also offers hydrating properties. Avoid physical scrubs entirely or use them with extreme caution.
- Mask: Hydrating cream masks, sheet masks infused with hyaluronic acid, glycerin, ceramides, or squalane are ideal. Look for ingredients that replenish moisture and strengthen the skin barrier.
- Toner: A hydrating toner with hyaluronic acid, rosewater, or ceramides to add a layer of moisture.
- Serum: Hyaluronic acid, squalane, polyglutamic acid, or barrier-repairing serums with ceramides are excellent choices.
- Moisturizer: A rich, emollient cream or balm to deeply nourish and lock in moisture. Consider one with occlusive ingredients like shea butter or petrolatum.
Sensitive Skin
Sensitive skin reacts easily to products, environmental factors, and can manifest as redness, itching, stinging, or irritation. The focus here is on calming, soothing, and strengthening the skin barrier with minimal, gentle ingredients.
- Cleanser: An ultra-gentle, fragrance-free, hypoallergenic cream or gel cleanser.
- Steam: Avoid steaming altogether, or keep it extremely brief and at a distance, as heat can exacerbate redness and sensitivity.
- Exfoliant: It’s often best to skip exfoliation during a sensitive skin facial, or use the mildest enzymatic exfoliant once a month with caution. Absolutely no physical scrubs.
- Mask: Calming and soothing masks with ingredients like colloidal oatmeal, centella asiatica (Cica), aloe vera, or ceramides. Avoid anything with strong fragrances, essential oils, or active ingredients like Vitamin C or strong acids.
- Toner: A simple, hydrating, fragrance-free toner, or just skip this step if your skin feels overwhelmed.
- Serum: Serums with ceramides, hyaluronic acid, or ingredients like bisabolol (from chamomile) to soothe and repair the barrier.
- Moisturizer: A rich, restorative, fragrance-free cream designed for sensitive skin to protect and repair the skin barrier.
Combination Skin
Combination skin is characterized by an oily T-zone (forehead, nose, chin) and normal to dry cheeks. This type requires a balanced approach, sometimes even “multi-masking.”
- Cleanser: A balanced, gentle gel or cream cleanser suitable for normal skin.
- Steam: Moderate steaming is generally well-tolerated.
- Exfoliant: A mild AHA (like lactic acid) or BHA (like salicylic acid) used sparingly, focusing on the T-zone.
- Mask: This is where multi-masking shines. Apply a clay mask to your oily T-zone and a hydrating or soothing mask to your drier cheeks.
- Toner: A balancing or hydrating toner.
- Serum: You might use a niacinamide serum for the T-zone and a hyaluronic acid serum for drier areas, or a single balanced serum for overall care.
- Moisturizer: A lightweight lotion for overall hydration, or a slightly richer cream for drier areas if needed.
Mature/Aging Skin
Mature skin often deals with concerns like fine lines, wrinkles, loss of elasticity, dullness, and dryness. Your facial should focus on nourishment, hydration, and ingredients that promote collagen production and cell turnover.
- Cleanser: A gentle, hydrating cream or oil cleanser to avoid stripping precious moisture.
- Steam: Moderate steaming to enhance product absorption.
- Exfoliant: Gentle AHAs (lactic or glycolic acid in lower concentrations) to promote cell turnover and improve texture. Enzymatic exfoliants are also a good choice.
- Mask: Firming, lifting, or intensely hydrating cream masks with peptides, antioxidants (Vitamin C, E), hyaluronic acid, or growth factors.
- Toner: A hydrating and antioxidant-rich toner.
- Serum: Serums packed with antioxidants (Vitamin C, Ferulic Acid), peptides, growth factors, or gentle retinoids (if your skin is accustomed to them).
- Moisturizer: A rich, emollient cream with anti-aging ingredients to provide deep hydration and support the skin barrier.
Always remember to patch test new products, especially if you have sensitive skin or are introducing new active ingredients. Listening to your skin’s unique responses is the most important part of tailoring your at-home facial for radiant and healthy results.
Enhancing Your At-Home Facial Experience
An at-home facial is more than just a sequence of skincare steps; it’s an opportunity to create a holistic well-being experience that nurtures your mind, body, and spirit. By consciously setting the scene and engaging your senses, you can transform a simple beauty routine into a profound act of self-care. Here’s how to elevate your DIY spa day to truly luxurious heights.
Cultivating the Perfect Ambiance
The environment plays a crucial role in setting the tone for relaxation.
- Lighting: Dim overhead lights and opt for soft, warm light sources. Candles (unscented if you have sensitive skin or are using fragranced products) can create a tranquil glow. Battery-operated tea lights are a safe alternative.
- Sound: Curate a calming playlist. This could be instrumental music, nature sounds (rain, ocean waves), or guided meditations. Silence can also be golden if that’s what brings you peace.
- Aromatherapy: A diffuser with essential oils can deeply enhance your mood. Lavender promotes relaxation, chamomile soothes, and frankincense offers grounding. Ensure the oils are pure and used safely, especially if you have pets.
- Temperature: Adjust the room temperature to be comfortably warm, preventing any shivers that might detract from your relaxation.
Mindful Engagement and Deep Relaxation
This is your time to disconnect from external demands and reconnect with yourself.
- Disconnect: Turn off your phone or put it on silent, out of reach. Resist the urge to check emails or scroll through social media. This is a digital detox moment.
- Deep Breathing: Incorporate deep breathing exercises throughout your facial, especially during the steaming and masking phases. Inhale slowly through your nose, hold for a few seconds, and exhale completely through your mouth. This activates the parasympathetic nervous system, promoting relaxation.
- Warm Comforts: Wrap yourself in a plush robe or soft blanket. Have a cup of herbal tea (chamomile, peppermint, or green tea) or infused water nearby to sip during your mask application. The warmth from the inside out contributes to a feeling of calm.
- Self-Massage: During the cleansing, serum, and moisturizing steps, incorporate gentle facial massage techniques. Use upward strokes to lift and invigorate, and gentle circular motions to stimulate circulation and lymphatic drainage. A facial roller or gua sha tool can be a wonderful addition here, providing a cooling sensation and helping products penetrate.
Integrating Holistic Wellness
The benefits of a facial extend beyond skin deep, influencing your overall well-being.
- Sleep Preparation: Consider scheduling your at-home facial in the evening. The calming ritual can be a powerful precursor to a good night’s sleep. Just as we share “3 tips to help you fall asleep in your new home,” such as optimizing your bedroom for darkness, coolness, and quiet, a relaxing facial routine can signal to your body that it’s time to unwind. The warmth, the gentle touch, and the soothing scents can help transition your mind from the day’s stresses to a state of readiness for restorative sleep.
- Hydration from Within: While your skin is being pampered topically, remember to hydrate internally. Drink plenty of water throughout the day, not just during your facial, to support skin elasticity and overall health.
- Nourishing Your Body: A healthy diet rich in antioxidants, vitamins, and minerals (found in fruits, vegetables, and lean proteins) directly contributes to skin health. Think of your diet as an internal facial that complements your external efforts.
- Mind-Body Connection: Reflect on how your skin feels and how your body responds to the self-care. This mindfulness can deepen your appreciation for your body and foster a healthier self-image.
- Inspiring Future Paths: For many women, developing a keen interest in skincare through at-home facials can even spark an interest in “exploring careers in health and beauty.” Understanding product ingredients, skin physiology, and the art of client care can open doors to roles as an esthetician, a cosmetic formulator, a beauty journalist, or even a wellness coach. The knowledge and passion cultivated in your personal spa can become a foundation for professional growth and contribution to the wider wellness community, potentially even by 2026.
By consciously enhancing each aspect of your at-home facial, you’re not just performing a skincare routine; you’re indulging in a deeply personal and enriching ritual that benefits your skin, calms your mind, and invigorates your spirit. This dedicated time becomes a cornerstone of your ongoing wellness practice, leaving you feeling refreshed, rejuvenated, and utterly radiant.
Post-Facial Care and Long-Term Skin Health
Completing an at-home facial is a wonderful achievement, but the journey to healthy, glowing skin doesn’t end there. Post-facial care and consistent daily habits are crucial for maximizing the benefits of your treatment and maintaining your skin’s radiance in the long run. Think of your facial as a deep conditioning treatment; without ongoing care, the results will fade more quickly.
Immediate Post-Facial Care
- Avoid Touching Your Face: Resist the temptation to touch or pick at your skin after a facial, as your pores are open and more susceptible to bacteria.
- Let Products Absorb: Give your serums and moisturizer ample time to fully absorb. Avoid applying makeup immediately if possible, allowing your skin to breathe and benefit from the freshly applied nutrients.
- Hydrate Internally: Continue to drink plenty of water throughout the day and in the hours following your facial. Hydration from within is just as important as topical moisture.
- Sun Protection is Key: If you’ve performed your facial during the day, ensure you’ve applied a broad-spectrum SPF 30 or higher. Exfoliated skin is more vulnerable to sun damage, which can undo all your hard work. Even on cloudy days, UV rays are present.
- Gentle Routine for the Next 24 Hours: For the day following your facial, stick to a very gentle cleansing and moisturizing routine. Avoid harsh active ingredients like strong retinoids or aggressive exfoliants, as your skin may be more sensitive.
Establishing a Consistent Daily Skincare Routine
The true secret to lasting skin health lies in consistency. An occasional facial provides a boost, but a dedicated daily routine maintains and builds upon those benefits.
- Morning Routine:
- Gentle Cleanse:
Recommended Resources
For more on how to do, see How To Make Cocktails At Home on Rock Salt Plum.
Check out Best Drugstore Makeup Products That Rival High End Brands on Sometimes Daily for a deeper dive.