Glow Naturally: Easy DIY Beauty Recipes for Radiant Skin and Hair
By Sarah Chen | Last Updated: June 23, 2024
Unveiling the Power of DIY Natural Beauty Recipes: Why Go Homemade?
The allure of store-bought beauty products, often marketed with lofty promises, can be hard to resist. However, a closer look often reveals a cocktail of chemicals, artificial fragrances, and preservatives that can sometimes do more harm than good, particularly for sensitive individuals. Embracing DIY natural beauty recipes offers a myriad of compelling benefits that align perfectly with a conscious, wellness-focused lifestyle.
- Ingredient Control and Transparency: When you craft your own beauty products, you know exactly what goes into them. This eliminates concerns about undisclosed allergens, harsh chemicals like parabens, sulfates, phthalates, and synthetic dyes. You have the power to choose organic, ethically sourced ingredients, ensuring purity and potency.
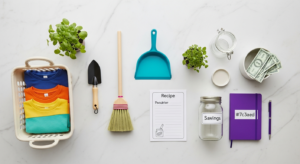
- Cost-Effectiveness: High-quality commercial beauty products can be incredibly expensive. Many natural ingredients found in your kitchen or local grocery store—like oats, honey, coconut oil, and avocados—are budget-friendly staples. For example, a single jar of organic coconut oil can serve as a moisturizer, hair mask, and makeup remover, offering remarkable value.
- Customization for Your Unique Needs: No two individuals have identical skin or hair. Commercial products are designed for broad appeal, but DIY recipes allow you to tailor ingredients and concentrations specifically to your skin type (oily, dry, sensitive, mature) or hair concerns (frizz, dryness, dullness). This personalized approach often yields superior results.
- Environmental Sustainability: Opting for homemade beauty significantly reduces your ecological footprint. You minimize packaging waste, avoid supporting industries that rely on unsustainable practices, and often choose ingredients that are biodegradable and less harmful to waterways. Many DIY enthusiasts also reuse containers, further enhancing their green credentials.
- Empowerment and Self-Care Ritual: The act of creating your own beauty treatments is inherently therapeutic. It transforms a routine task into a mindful ritual, a moment of self-care and creativity. This hands-on engagement fosters a deeper connection to your body and promotes a sense of well-being, enhancing the holistic experience of beauty.
By opting for homemade solutions, you’re not just making a beauty choice; you’re making a conscious lifestyle choice that benefits your health, your wallet, and the planet.
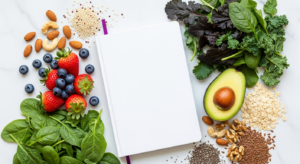
Radiant Skin From Your Pantry: Easy Facial Care DIYs

Achieving a luminous complexion doesn’t require a cabinet full of expensive serums. Your kitchen is a treasure trove of ingredients for effective and gentle facial care. These DIY natural beauty recipes cater to various needs, from cleansing to deep treatment.
Gentle Cleansers & Exfoliators
- Oatmeal & Honey Cleanser (for all skin types, especially sensitive):
Benefits: Oats are known for their soothing, anti-inflammatory properties and gentle exfoliation. Honey is a natural humectant and antibacterial agent.
How to: Mix 2 tablespoons finely ground oats with 1 tablespoon raw honey and a splash of warm water to form a paste. Gently massage onto damp face in circular motions for 1-2 minutes, then rinse thoroughly with lukewarm water. Use daily or every other day.
- Coffee Ground Face Scrub (for dull skin):
Benefits: Coffee grounds provide excellent physical exfoliation, stimulating blood flow and leaving skin invigorated. Caffeine can temporarily reduce puffiness.
How to: Combine 1 tablespoon used coffee grounds (finely ground) with 1 tablespoon coconut oil or olive oil. Apply to a clean, damp face, gently scrubbing in upward circles for 30-60 seconds. Rinse well. Use 1-2 times per week.
Nourishing Face Masks
- Avocado & Honey Hydrating Mask (for dry/normal skin):
Benefits: Avocado is rich in healthy fats, vitamins E and C, deeply moisturizing and nourishing the skin. Honey adds humectant properties.
How to: Mash half a ripe avocado with 1 tablespoon raw honey. Apply an even layer to your clean face and neck. Leave on for 15-20 minutes, then rinse with warm water. Use 1-2 times per week.
- Turmeric & Yogurt Brightening Mask (for uneven tone/acne-prone skin):
Benefits: Turmeric is a powerful anti-inflammatory and antioxidant, known for brightening skin. Yogurt contains lactic acid, a gentle AHA that exfoliates and clarifies. [1]
How to: Mix 1 teaspoon organic turmeric powder with 2 tablespoons plain, unsweetened yogurt. Apply to clean skin, avoiding the eye area. Leave on for 10-15 minutes (turmeric can stain, so be cautious and don’t leave on too long), then rinse thoroughly. Use once a week. (Patch test first to check for staining and sensitivity).
- Bentonite Clay Detox Mask (for oily/acne-prone skin):
Benefits: Bentonite clay draws out impurities, absorbs excess oil, and tightens pores. It’s a fantastic natural detoxifier.
How to: Mix 1 tablespoon bentonite clay powder with 1-2 tablespoons apple cider vinegar or water to form a smooth paste. Apply to clean face. Let it dry for 10-15 minutes (you’ll feel a tightening sensation), then rinse completely. Use once a week.
Balancing Toners & Moisturizers
- Apple Cider Vinegar (ACV) Toner (for balancing pH):
Benefits: ACV helps balance the skin’s pH, fights bacteria, and can minimize pores. It’s a classic natural toner.
How to: Mix 1 part raw, unfiltered apple cider vinegar with 3-4 parts distilled water (adjust ratio based on sensitivity). Apply with a cotton pad to clean skin after cleansing. Follow with a moisturizer. Use once daily, preferably at night.
- Rose Water Hydrating Mist (for all skin types):
Benefits: Rose water is soothing, anti-inflammatory, and helps hydrate the skin. It also has a beautiful, natural scent.
How to: Simply pour pure rose water into a clean spray bottle. Mist onto your face throughout the day to refresh, hydrate, and set makeup. Store in the refrigerator for an extra cooling effect.
- Aloe Vera Gel Moisturizer (for light hydration):
Benefits: Pure aloe vera is incredibly soothing, hydrating, and has anti-inflammatory properties, perfect for sensitive or oily skin.
How to: Apply a small amount of pure aloe vera gel (from a plant or 100% pure bottled) directly to your face after cleansing and toning. It absorbs quickly and provides lightweight moisture.
Beyond the Face: Nourishing DIY Body Care Creations
Our bodies deserve just as much love and attention as our faces. These holistic DIY natural beauty recipes extend the goodness of homemade care to your entire being, promoting soft, supple skin from head to toe.
Invigorating Body Scrubs
- Sugar & Olive Oil Body Scrub (for smooth, soft skin):
Benefits: Sugar is a gentle physical exfoliant, removing dead skin cells to reveal smoother skin. Olive oil provides intense hydration and antioxidants.
How to: Mix 1 cup granulated sugar with ½ cup extra virgin olive oil. You can add 10-15 drops of essential oil (e.g., lavender for relaxation, peppermint for invigoration). In the shower, apply to damp skin, massaging in circular motions, paying extra attention to rough areas like elbows and knees. Rinse thoroughly. Use 1-2 times per week.
- Himalayan Salt Detox Scrub (for mineral benefits):
Benefits: Himalayan salt contains numerous minerals and provides excellent exfoliation, aiding in detoxification. Coconut oil is deeply moisturizing and antibacterial.
How to: Combine ½ cup fine or medium-grain Himalayan pink salt with ¼ cup melted coconut oil. Add 5-10 drops of grapefruit or eucalyptus essential oil for an uplifting scent. Apply as you would the sugar scrub. Note: salt scrubs can be more abrasive, so use gently, especially on sensitive skin. Use once a week.
Rich Body Butters & Lotions
- Whipped Shea Butter Body Cream (for intense hydration):
Benefits: Shea butter is incredibly nourishing, rich in vitamins A and E, and provides a protective barrier for the skin. Coconut oil adds extra moisture and a smooth texture.
How to: In a double boiler, gently melt ½ cup raw shea butter and ¼ cup coconut oil. Remove from heat and let cool slightly (it should still be liquid). Add 1 tablespoon almond oil and 10-15 drops of your favorite essential oil (e.g., vanilla, patchouli). Place the mixture in the refrigerator for 20-30 minutes until it begins to solidify around the edges. Whip with an electric mixer for 5-10 minutes until light and fluffy. Transfer to a clean, airtight jar. Store at room temperature. Use daily after showering.
- Lavender & Oatmeal Bath Soak (for relaxation and skin soothing):
Benefits: Epsom salts relax muscles and detoxify. Oatmeal soothes irritated skin. Lavender essential oil promotes relaxation and a peaceful sleep.
How to: Combine 1 cup Epsom salts with ½ cup finely ground colloidal oatmeal. Add 10 drops of lavender essential oil and stir well. Add the mixture to warm running bath water and soak for 20-30 minutes. Use as needed for stress relief and skin comfort.
Lustrous Locks Naturally: Transformative DIY Hair Treatments

Healthy, vibrant hair often starts with nurturing ingredients from nature. These practical DIY natural beauty recipes can address common hair concerns, from dryness and dullness to scalp health, helping you achieve truly lustrous locks.
Deep Conditioning Hair Masks
- Egg & Olive Oil Hair Mask (for strength and shine):
Benefits: Eggs are packed with protein, essential for hair strength and repair. Olive oil provides deep conditioning and adds incredible shine.
How to: Whisk 1-2 raw eggs (depending on hair length) with 2 tablespoons extra virgin olive oil until well combined. Apply evenly to dry or damp hair, from roots to ends. Cover with a shower cap and leave on for 20-30 minutes. Rinse thoroughly with cool water (hot water can “cook” the egg), then shampoo and condition as usual. Use once every 1-2 weeks.
- Banana & Honey Hydrating Mask (for dry, damaged hair):
Benefits: Bananas are rich in potassium, natural oils, carbohydrates, and vitamins, which condition and soften hair. Honey adds moisture and shine.
How to: Mash one very ripe banana until absolutely smooth (no chunks!). Mix in 1 tablespoon raw honey and 1 tablespoon coconut oil (melted if solid). Apply to damp hair, ensuring full coverage. Leave on for 20-30 minutes. Rinse very thoroughly, then shampoo and condition. Use once a week.
Scalp Treatments & Rinses
- Apple Cider Vinegar (ACV) Hair Rinse (for clarifying and shine):
Benefits: ACV helps to balance scalp pH, remove product buildup, and close hair cuticles for enhanced shine. It also has antifungal properties that can help with dandruff.
How to: Mix ¼ cup raw, unfiltered ACV with 1 cup distilled water. After shampooing, pour the mixture over your hair, focusing on the scalp. Gently massage. Let it sit for 2-5 minutes, then rinse thoroughly with cool water. Use 1-2 times per week. (The vinegar smell dissipates as hair dries).
- Tea Tree Oil Scalp Treatment (for itchy or flaky scalp):
Benefits: Tea tree oil has powerful antimicrobial and anti-inflammatory properties, making it excellent for soothing an irritated or flaky scalp.
How to: Mix 5-7 drops of pure tea tree essential oil with 2 tablespoons of a carrier oil like jojoba, almond, or coconut oil. Massage the mixture directly into your scalp. Leave on for 15-30 minutes (or overnight for intense treatment), then shampoo and condition as usual. Use 1-2 times per week.
- Rice Water Rinse (for hair growth and strength):
Benefits: Rich in amino acids, vitamins, and minerals, rice water has been used for centuries for its purported ability to strengthen hair, improve elasticity, and promote growth.
How to: Rinse ½ cup raw rice thoroughly. Place the rice in a bowl with 2-3 cups of water. Let it soak for 30 minutes to an hour (or ferment for 24-48 hours at room temperature for stronger effects). Strain the rice and keep the cloudy water. After shampooing, pour the rice water over your hair, massaging into the scalp and strands. Leave on for 5-10 minutes, then rinse thoroughly with plain water. Use 1-2 times per week.
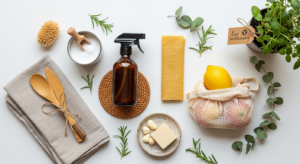
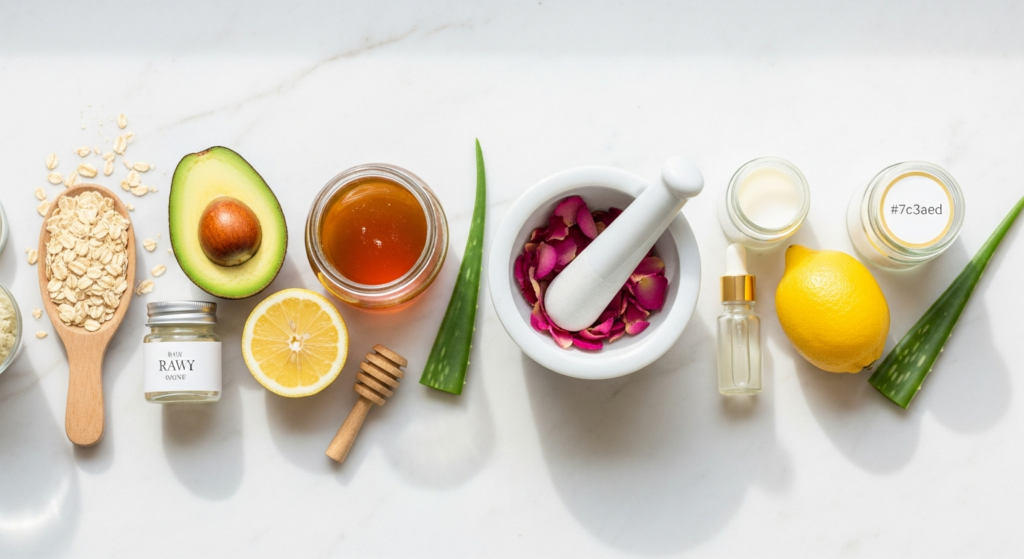
Essential Ingredients for Your DIY Natural Beauty Apothecary
Building your own natural beauty repertoire starts with stocking a few versatile, power-packed ingredients. These staples are the foundation for countless DIY natural beauty recipes, offering a wide array of benefits for skin and hair.
- Coconut Oil: A multi-tasking marvel. Excellent for deep hair conditioning, body moisturizing, makeup removal, and as a base for scrubs. Rich in fatty acids, it’s intensely hydrating and has antimicrobial properties.
- Extra Virgin Olive Oil: Another fantastic emollient. Great for moisturizing dry skin, as a carrier oil for essential oils, and as a nourishing hair treatment. High in antioxidants like Vitamin E.
- Raw Honey: A natural humectant (draws moisture to the skin), antibacterial, and anti-inflammatory. Perfect for facial cleansers, masks, and soothing treatments.
- Oats (Rolled or Colloidal): Incredibly soothing and anti-inflammatory, making them ideal for sensitive or irritated skin. Used in cleansers, masks, and bath soaks.
- Plain, Unsweetened Yogurt: Contains lactic acid (a gentle alpha-hydroxy acid) for mild exfoliation, and probiotics that can benefit skin health. Great for brightening and smoothing masks.
- Aloe Vera Gel: A universal soother and hydrator. Excellent for calming sunburns, reducing inflammation, and as a lightweight moisturizer for both skin and hair. Look for 100% pure, uncolored gel.
- Apple Cider Vinegar (Raw, Unfiltered): A fantastic toner for balancing skin pH and clarifying hair. Its acetic acid content helps dissolve product buildup and kill bacteria.
- Baking Soda: While often overused, in moderation, it can be a gentle exfoliant (e.g., in a paste with water for a quick foot scrub) or used to neutralize odors in homemade deodorants. Use sparingly on skin due to its high pH.
- Clays (Bentonite, Kaolin, Rhassoul): Mineral-rich clays are superb for drawing out impurities, absorbing excess oil, and detoxifying the skin. Bentonite is strong, while Kaolin is gentler for sensitive skin.
- Essential Oils: Offer therapeutic benefits and natural fragrance. Popular choices include Lavender (calming), Tea Tree (antimicrobial, good for acne/scalp), Peppermint (invigorating), Frankincense (anti-aging), and Rose (hydrating, soothing). Always dilute essential oils in a carrier oil before applying to skin.
By keeping these fundamental ingredients on hand, you’ll be well-equipped to whip up a wide array of customized beauty solutions at a moment’s notice.
Safety First: Best Practices and Storage for Homemade Beauty
While DIY natural beauty recipes offer immense benefits, safety and proper handling are paramount. Unlike commercially produced products, homemade creations typically lack synthetic preservatives, making them more susceptible to bacterial growth and spoilage. Adhering to these best practices will ensure your beauty regimen is both effective and safe.
- Patch Test Everything: Before applying any new DIY recipe to your face or large areas of your body, always perform a patch test. Apply a small amount to an inconspicuous area (like behind your ear or on your inner arm) and wait 24-48 hours to check for any redness, itching, burning, or irritation. This is crucial even with natural ingredients, as sensitivities can still occur (e.g., turmeric staining, essential oil reactions).
- Hygiene is Non-Negotiable:
- Always start with clean hands, tools, and work surfaces.
- Use sterilized containers (glass jars are ideal and can be boiled or run through a dishwasher on a hot cycle) for storing your creations.
- Avoid dipping your fingers directly into products. Instead, use clean spatulas, spoons, or cotton pads to extract product.
- Source Quality Ingredients: Use fresh, organic, food-grade ingredients whenever possible. For essential oils, opt for reputable brands that provide purity reports. Spoiled or low-quality ingredients can introduce bacteria and reduce efficacy.
- Be Mindful of Shelf Life:
- Water-based recipes (e.g., fresh fruit masks, rice water, ACV toners): These are highly perishable and generally last only 1-3 days when stored in the refrigerator. Make small batches and use them quickly.
- Oil-based recipes (e.g., scrubs with oils, whipped body butters): These have a longer shelf life, typically 1-3 months, especially if kept in a cool, dark place. The presence of water (even from a wet spoon) can significantly shorten their lifespan.
- Dry ingredients (e.g., clay masks, dry scrubs before adding liquid): These can last for months or even years if stored in airtight containers away from moisture.
- Proper Storage:
- Store most homemade products in airtight glass containers (amber or opaque glass for essential oil blends to protect from light).
- Refrigerate water-based products.
- Keep oil-based products in a cool, dark place to prevent oxidation and rancidity.
- Discard anything that smells off, changes color, or shows signs of mold. “When in doubt, throw it out!”
- Know Your Essential Oils: Research the properties and contraindications of any essential oil you use. Some are photosensitive (e.g., citrus oils can cause burns when exposed to sun), others are too strong for direct skin application, and some should be avoided during pregnancy or by certain health conditions. Always dilute them in a carrier oil.
- Avoid Eye Contact: Many ingredients, especially essential oils, can be irritating to the eyes. Be extremely careful when applying products to your face.
By following these guidelines, you can enjoy the peace of mind that comes with using safe, effective, and truly natural beauty solutions.
Customizing Your Glow: Tailoring DIY Recipes for Every Skin and Hair Type
The true beauty of DIY natural beauty recipes lies in their adaptability. By understanding your unique skin and hair needs, you can effortlessly tweak recipes to maximize their benefits and achieve your personalized “glow naturally.”
Tailoring for Skin Types:
- Oily/Acne-Prone Skin:
- Cleansers: Focus on gentle yet purifying ingredients like finely ground oats or chickpea flour mixed with water or witch hazel.
- Masks: Bentonite clay, green clay, or fuller’s earth masks are excellent for drawing out impurities and absorbing excess oil. Turmeric and yogurt masks can help with inflammation and redness.
- Toners: Diluted apple cider vinegar (ACV) or witch hazel effectively balance pH and minimize pores.
- Moisturizers: Opt for lightweight, non-comedogenic oils like jojoba oil (which mimics skin’s natural sebum) or pure aloe vera gel.
- Essential Oils: Tea tree oil, lavender, and frankincense are beneficial for their antibacterial and healing properties (always diluted).
- Dry/Dehydrated Skin:
- Cleansers: Creamy options like raw honey, avocado, or a blend of almond oil and honey will cleanse without stripping moisture.
- Masks: Avocado, banana, or yogurt masks enriched with extra virgin olive oil or argan oil provide deep hydration.
- Toners: Hydrating rose water or chamomile hydrosol are soothing and provide a moisture boost.
- Moisturizers: Richer oils like argan oil, almond oil, shea butter, or a blend of these will lock in moisture effectively.
- Essential Oils: Rose, sandalwood, or geranium are hydrating and rejuvenating.
- Sensitive/Reactive Skin:
- Cleansers: Extremely gentle options like colloidal oatmeal or pure aloe vera gel are best.
- Masks: Soothing ingredients like oatmeal, plain yogurt, or pure aloe vera work well. Avoid strong exfoliants or highly acidic ingredients.
- Toners: Pure rose water or diluted chamomile tea are calming and non-irritating.
- Moisturizers: Simple, single-ingredient oils like jojoba oil or pure shea butter are less likely to cause reactions.
- Essential Oils: Lavender and chamomile are known for their calming properties, but always patch test with extreme caution, or avoid altogether if highly sensitive.
- Mature/Aging Skin:
- Cleansers: Hydrating, gentle cleansers that don’t strip natural oils.
- Masks: Avocado, honey, and nutrient-rich ingredients like spirulina powder (mixed with water/honey) can provide antioxidants and hydration.
- Toners: Hydrating toners like rose water or green tea.
- Moisturizers: Rich, antioxidant-rich oils such as argan oil, rosehip oil, or a whipped shea butter blend can help with elasticity and fine lines.
- Essential Oils: Frankincense, myrrh, rose, and carrot seed oil are prized for their regenerative properties.
Tailoring for Hair Types:
- Oily Hair/Scalp:
- Shampoo alternatives: Dry shampoo from cornstarch/arrowroot powder.
- Rinses: Diluted ACV rinse to clarify and balance scalp pH.
- Masks: Clay masks (like bentonite) mixed with water to draw out excess oil from the scalp.
- Essential Oils: Tea tree, peppermint, or rosemary added to a carrier oil for scalp massage.
- Dry/Damaged Hair:
- Masks: Deep conditioning with avocado, banana, eggs, coconut oil, or olive oil.
- Rinses: Rice water for strength and hydration.
- Leave-ins: A tiny amount of argan oil or shea butter on the ends to seal moisture.
- Essential Oils: Lavender, sandalwood, or ylang-ylang added to hair masks or carrier oils.
- Fine/Limp Hair:
- Rinses: ACV rinse to remove buildup that can weigh hair down.
- Masks: Lighter masks, perhaps with egg white instead of yolk for protein boost without heaviness.
- Avoid: Heavy oils or butters that can flatten fine hair.
- Essential Oils: Rosemary or peppermint to stimulate the scalp without adding weight.
- Coarse/Thick Hair:
- Masks: Can handle richer, heavier masks like pure coconut oil or shea butter.
- Leave-ins: Generous amounts of nourishing oils to control frizz and add shine.
- Essential Oils: Frankincense or cedarwood for deep conditioning.
By understanding the properties of natural ingredients and how they interact with your specific skin and hair characteristics, you can become your own beauty alchemist, creating tailored solutions that truly work for you.
Conclusion: Embrace Your Natural Radiance
Embarking on the journey of DIY natural beauty recipes is more than just a trend; it’s a conscious choice to embrace transparency, sustainability, and profound self-care. As we’ve explored, the ingredients for a truly radiant glow are often found right within your reach, offering potent solutions for skin and hair without the need for artificial additives or exorbitant prices. From soothing oat cleansers to revitalizing avocado masks and strengthening rice water rinses, the power to nurture your beauty naturally is now firmly in your hands.
At Veralyn Media, we believe that true wellness encompasses every aspect of your life, including the products you choose to put on your body. By integrating these simple, effective, and empowering DIY solutions into your routine, you’re not just creating beauty products; you’re cultivating a deeper connection with nature, fostering a mindful approach to self-care, and ultimately, uncovering your most authentic and radiant self. Dare to experiment, listen to what your body truly needs, and revel in the profound satisfaction of glowing naturally, inside and out.
Ready to start your natural beauty journey? Pick one recipe from this guide that resonates with your current needs and gather your ingredients this week. Share your experiences and favorite DIY discoveries with us!
Frequently Asked Questions
Reviewed By: Dr. Emily Green, ND
Dr. Emily Green is a licensed Naturopathic Doctor with over 10 years of experience in holistic health and natural skincare. She reviews Veralyn Media’s wellness content for accuracy and safety.
References: