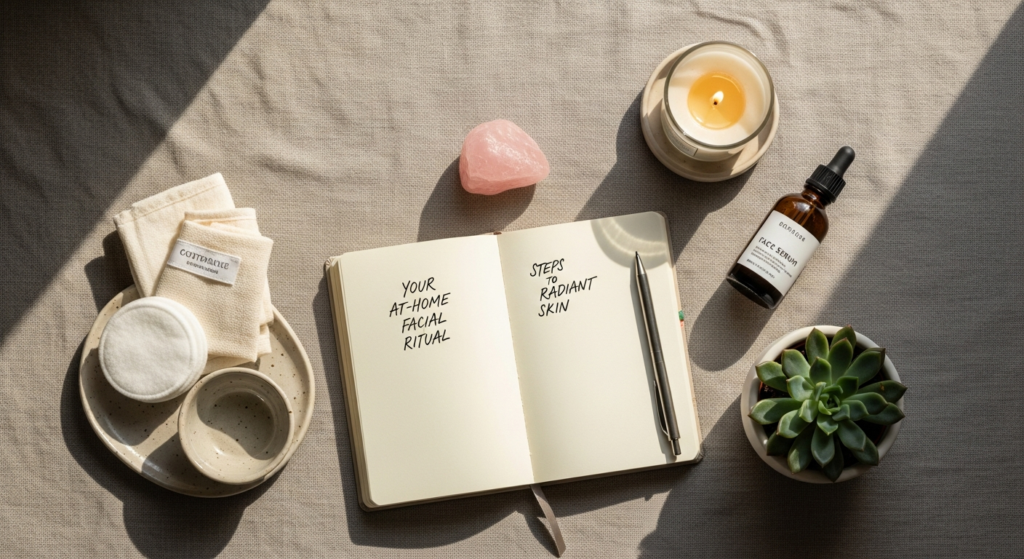
Why an At-Home Facial is a Game-Changer for Your Skin and Soul
The allure of a professional facial is undeniable, promising expert care and visible results. However, the convenience, cost-effectiveness, and personalized touch of an at-home facial make it an invaluable addition to any woman’s wellness arsenal. Beyond the superficial glow, engaging in a regular at-home facial routine offers a multitude of benefits that extend far beyond just skin deep.
Firstly, it empowers you to take control of your skincare. You become intimately familiar with your skin’s unique needs, allowing you to select products that truly work for you. This personalized approach can be far more effective than a one-size-fits-all treatment, especially as your skin evolves with age, hormones, and environmental factors. Understanding your skin is a fundamental aspect of Womens Health Tips Every Woman Should Know, as healthy skin often reflects internal health.
Secondly, the financial savings are significant. Professional facials can be costly, and maintaining their benefits often requires frequent appointments. By mastering how to do a facial at home step by step, you can enjoy spa-like results at a fraction of the price, making consistent skincare accessible and sustainable. This allows you to allocate your budget to other important aspects of your life, whether it’s investing in high-quality ingredients for your home facial or other wellness pursuits.
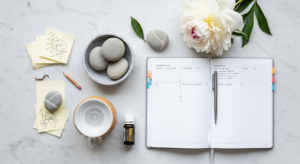
Thirdly, and perhaps most importantly, an at-home facial is a powerful act of self-care. In a world that constantly demands our attention, carving out dedicated time for ourselves is crucial for mental and emotional well-being. The ritual of cleansing, massaging, and masking provides a meditative escape, reducing stress and promoting relaxation. This stress reduction is not only beneficial for mental clarity but also plays a role in overall physiological health, including reproductive health. For women who are exploring Fertility Health Tips Women Trying Conceive, managing stress through self-care practices like regular facials can be a gentle yet impactful way to support their journey. The intentionality of creating a serene environment, even if it’s just for 30-60 minutes, helps to ground you and reconnect with your inner self. It’s a moment to breathe, reflect, and nurture your body and mind, fostering a sense of calm that radiates from within.
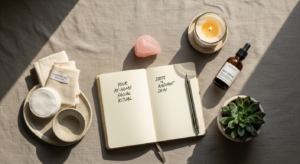
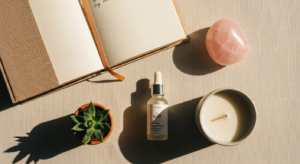
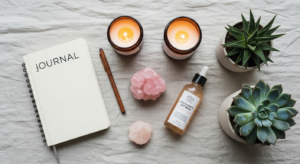
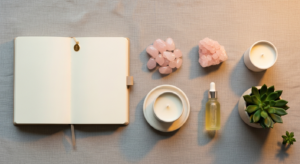
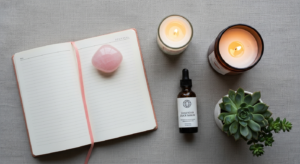
Gathering Your At-Home Facial Arsenal: Essential Products and Tools

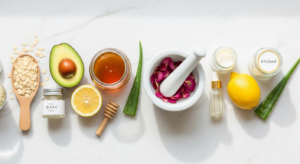
Before you embark on your journey to radiant skin, it’s crucial to gather the right tools and products. Think of this as preparing your canvas before painting a masterpiece. Having everything laid out and ready will ensure a smooth, uninterrupted, and truly relaxing experience. The beauty of an at-home facial is the flexibility to choose products tailored to your specific skin type and concerns, whether you have oily, dry, sensitive, combination, or mature skin.
Key Products You’ll Need:
- Gentle Cleanser: Start with a high-quality cleanser that effectively removes makeup, dirt, and impurities without stripping your skin of its natural oils. Look for formulations that are sulfate-free and pH-balanced. For sensitive skin, a cream or gel cleanser is ideal. For oily or acne-prone skin, a foaming cleanser with salicylic acid can be beneficial.
- Exfoliator: This is a crucial step for removing dead skin cells and revealing brighter skin. You have two main options:
- Physical Exfoliant: A gentle scrub with fine, spherical beads (avoid harsh, jagged particles that can cause micro-tears).
- Chemical Exfoliant: Products containing AHAs (Alpha Hydroxy Acids like glycolic or lactic acid) or BHAs (Beta Hydroxy Acids like salicylic acid). These dissolve dead skin cells and are often preferred for their even exfoliation and ability to penetrate deeper. Choose according to your skin’s tolerance.
- Facial Steamer or Hot Towel: A facial steamer opens up pores and softens the skin, preparing it for deeper cleansing and product absorption. If you don’t have a steamer, a bowl of hot water and a towel will do the trick.
- Facial Mask: This is where you can truly customize your facial.
- Hydrating Mask: For dry or dehydrated skin (e.g., hyaluronic acid, glycerin, ceramides).
- Clay or Charcoal Mask: For oily, congested, or acne-prone skin (draws out impurities).
- Brightening Mask: For dullness or hyperpigmentation (e.g., Vitamin C, niacinamide).
- Soothing Mask: For sensitive or irritated skin (e.g., aloe vera, centella asiatica).
Consider having a couple of options on hand for multi-masking (applying different masks to different areas of your face).
- Toner: A hydrating or balancing toner helps to restore the skin’s pH balance after cleansing and prepares it for subsequent product absorption. Avoid toners with high alcohol content.
- Serum: A concentrated treatment designed to address specific skin concerns.
- Vitamin C Serum: For brightening and antioxidant protection.
- Hyaluronic Acid Serum: For intense hydration.
- Retinol Serum: For anti-aging (use sparingly and at night).
- Niacinamide Serum: For pore refinement, barrier support, and redness reduction.
- Moisturizer: A good moisturizer locks in hydration and protects the skin barrier. Choose one appropriate for your skin type – lighter lotions for oily skin, richer creams for dry skin.
- Eye Cream: The delicate skin around the eyes requires special attention. A dedicated eye cream helps to hydrate, reduce puffiness, and minimize fine lines.
- SPF (for daytime facials): If you’re doing your facial during the day, always finish with a broad-spectrum sunscreen of at least SPF 30 to protect your freshly treated skin.
Helpful Tools:
- Hairband or Headband: To keep hair away from your face.
- Soft Facial Towels: For patting your face dry.
- Cotton Pads or Rounds: For applying toner or removing masks.
- Small Bowls: For mixing masks or holding water.
- Spatula or Brush: For hygienic mask application.
- Music/Candles/Essential Oil Diffuser: To enhance the spa-like ambiance.
When selecting products, especially for women who are considering Fertility Health Tips Women Trying Conceive, it’s wise to opt for formulations with clean ingredients, free from parabens, phthalates, and synthetic fragrances, as these can have broader health implications. Prioritizing natural and gentle ingredients isn’t just good for your skin; it’s a holistic approach to wellness.
The Step-by-Step At-Home Facial Ritual: Your Path to Glowing Skin
Step 1: Double Cleansing – The Foundation of Purity (5-10 minutes)
This crucial first step ensures your skin is a clean slate, ready to absorb all the goodness that follows.
- First Cleanse (Oil-Based): Begin by removing makeup, sunscreen, and surface impurities with an oil-based cleanser, balm, or micellar water. Gently massage it onto dry skin using circular motions for about 60 seconds, paying attention to areas with heavy makeup. This ‘first cleanse’ breaks down oil-based products effectively. Rinse thoroughly with lukewarm water.
- Second Cleanse (Water-Based): Follow with your chosen gentle water-based cleanser. Lather a small amount in your hands and massage it onto damp skin for another 60 seconds. This step removes any remaining grime, sweat, and ensures your pores are truly clean. Rinse thoroughly and gently pat your face dry with a soft, clean towel. Avoid rubbing, as this can irritate the skin.
Why it’s important: Double cleansing ensures a deeper clean than a single cleanse, preventing clogged pores and allowing subsequent products to penetrate more effectively. It creates the perfect foundation for your facial.
Step 2: Exfoliation – Unveiling Radiance (5-10 minutes)
Exfoliation is key to removing dead skin cells that can dull your complexion and clog pores.
- Choose Your Exfoliant:
- For Physical Exfoliants: Apply a small amount to damp skin and gently massage in circular motions, avoiding the delicate eye area. Be very light-handed; let the product do the work. Focus on areas prone to congestion, like the T-zone.
- For Chemical Exfoliants (AHAs/BHAs): Apply to clean, dry skin following the product’s instructions. Often, you’ll leave it on for a specified time (e.g., 5-10 minutes) before rinsing.
- Rinse and Pat Dry: After the recommended time, thoroughly rinse your face with lukewarm water until all traces of the exfoliant are gone. Pat your skin dry.
Why it’s important: Regular exfoliation brightens the skin, improves texture, minimizes the appearance of pores, and allows serums and moisturizers to absorb more effectively. Over-exfoliation can cause irritation, so listen to your skin and follow product guidelines carefully.
Step 3: Steaming – Opening Up Your Pores (5-10 minutes)
Steaming is a traditional spa step that prepares your skin for deeper treatments.
- Using a Facial Steamer: If you have a dedicated facial steamer, fill it with distilled water and position your face comfortably over the steam, following the manufacturer’s instructions.
- DIY Hot Towel Method: Alternatively, boil a pot of water, then carefully pour it into a large, heat-safe bowl. Drape a clean towel over your head, creating a tent over the bowl, and position your face about 8-12 inches above the water. Breathe deeply, allowing the steam to envelop your face. You can add a few drops of essential oils like lavender or eucalyptus to the water for an added aromatherapy boost (ensure you are not sensitive to them).
Why it’s important: The warm steam helps to soften the skin, loosen debris in the pores, and promotes circulation, giving your skin a healthy flush. This makes extraction (if you choose to do very gentle ones) and mask application more effective. This relaxing step is a prime example of Womens Health Tips Every Woman Should Know, as moments of relaxation significantly contribute to overall well-being.
Step 4: Masking – Targeted Treatment (10-20 minutes)
This is the heart of your at-home facial, where you deliver concentrated ingredients to address your specific skin concerns.
- Apply Your Mask: Using clean fingers, a brush, or a spatula, apply an even layer of your chosen facial mask to your face, avoiding the eye and lip areas. If you’re multi-masking, apply different masks to different zones (e.g., clay mask on the T-zone, hydrating mask on cheeks).
- Relax and Let it Work: Lie back, close your eyes, and let the mask work its magic for the recommended time (usually 10-20 minutes). This is an excellent time for meditation, deep breathing, or simply enjoying the quiet.
- Remove the Mask: Rinse thoroughly with lukewarm water. For clay masks, you might find it helpful to use a damp, soft cloth to gently wipe it off. Ensure no residue remains. Pat your skin dry.
Why it’s important: Masks provide an intensive dose of beneficial ingredients, helping to hydrate, purify, brighten, or soothe the skin, depending on the type you choose. It’s a powerful way to deliver targeted care.
Step 5: Toning – Balancing and Preparing (2-3 minutes)
Toning helps to restore your skin’s natural pH balance after cleansing and prepares it for optimal absorption of subsequent treatments.
- Apply Toner: Pour a small amount of your chosen toner onto a cotton pad or into the palms of your clean hands.
- Gently Apply: Gently swipe the cotton pad across your face and neck, or lightly press the toner into your skin with your hands.
Why it’s important: A good toner removes any lingering impurities, tightens the appearance of pores, and primes the skin, making it more receptive to serums and moisturizers. Look for hydrating and alcohol-free formulas.
Step 6: Serums & Treatments – Concentrated Care (2-5 minutes)
Serums are potent elixirs designed to deliver active ingredients deep into the skin to address specific concerns.
- Apply Serum: Dispense 2-4 drops of your chosen serum(s) onto your fingertips. Gently pat and press the serum into your face and neck until fully absorbed. If using multiple serums, apply them from thinnest to thickest consistency.
Why it’s important: Serums are the workhorses of your skincare routine, providing concentrated benefits like hydration, anti-aging, brightening, or blemish control. This step maximizes the therapeutic effects of your facial.
Step 7: Moisturizing – Sealing in the Goodness (2-3 minutes)
Moisturizer is essential for locking in all the beneficial ingredients you’ve applied and strengthening your skin’s protective barrier.
- Apply Moisturizer: Take a dime-sized amount of your preferred moisturizer. Warm it between your fingertips and gently massage it onto your face and neck using upward strokes.
Why it’s important: Moisturizing hydrates the skin, prevents moisture loss, and creates a protective barrier against environmental aggressors. It leaves your skin feeling soft, supple, and well-nourished.
Step 8: Eye Cream & SPF – Finishing Touches (2-3 minutes)
These final steps complete your facial and provide crucial protection.
- Apply Eye Cream: Dot a tiny amount of eye cream around your orbital bone (the bone surrounding your eye) using your ring finger, which applies the least pressure. Gently tap it in until absorbed, avoiding pulling or rubbing the delicate skin.
- Apply SPF (Daytime Only): If you’ve performed your facial during the day, this step is non-negotiable. Apply a broad-spectrum sunscreen with at least SPF 30 as the very last step. This protects your freshly treated, vulnerable skin from harmful UV rays.
Why it’s important: Eye cream targets specific concerns around the eyes, while SPF is the ultimate anti-aging and protective measure, essential for maintaining the health and radiance achieved through your facial.
Completing these steps will leave your skin feeling incredibly refreshed, hydrated, and glowing. Remember, consistency is key, and integrating this ritual into your routine will yield long-term benefits for your skin and your overall sense of well-being.
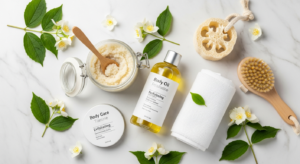
Elevating Your At-Home Facial Experience: Tips for a Spa-Like Sanctuary
An at-home facial isn’t just about applying products; it’s about creating an experience that nurtures your mind and body. To truly achieve that blissful, spa-like sanctuary, consider incorporating these elements into your routine. This holistic approach aligns perfectly with Womens Health Tips Every Woman Should Know, emphasizing that self-care is a multi-faceted endeavor.
Set the Ambiance:
- Lighting: Dim the overhead lights and use soft, indirect lighting. Candles (scented or unscented) can add a warm, soothing glow.
- Aromatherapy: Use an essential oil diffuser with calming scents like lavender, chamomile, frankincense, or sandalwood. If you’re doing a steam, a few drops of essential oil in the water can also be lovely (ensure they are skin-safe and you have no sensitivities).
- Soundscape: Play calming music, nature sounds, or a guided meditation. Silence can also be golden if that’s what helps you unwind.
- Temperature: Ensure your space is comfortably warm, especially if you’ll be exposing your skin to steam.
Enhance Comfort:
- Comfortable Attire: Slip into a soft robe or comfortable pajamas.
- Warm Towels: Have several soft, clean towels at hand. You can even warm them slightly on a radiator or in a towel warmer for an extra touch of luxury.
- Hydration: Keep a glass of water, herbal tea, or fruit-infused water nearby to sip on throughout your facial. Hydration from within complements external skincare efforts.
Mindful Movement and Relaxation:
- Self-Massage: During cleansing and serum application, incorporate gentle facial massage techniques. Use upward and outward strokes to encourage lymphatic drainage and boost circulation. You can also use a jade roller or gua sha tool after applying serum to enhance absorption and reduce puffiness.
- Deep Breathing: Throughout the process, especially during masking and steaming, practice deep, mindful breathing. Inhale slowly through your nose, hold for a few seconds, and exhale slowly through your mouth. This helps to activate your parasympathetic nervous system, promoting deep relaxation.
- Digital Detox: Put your phone away. Resist the urge to scroll or answer emails. This time is for you and your skin.
By intentionally creating a peaceful environment and engaging all your senses, your at-home facial transforms from a mere skincare routine into a powerful self-care ritual. This dedicated time to de-stress and recharge is incredibly important, especially for women navigating busy lives, perhaps juggling work and family responsibilities, or even managing a How To Set Up Family Home Office. Scheduling this “me-time” is an investment in your mental and physical health, allowing you to return to your daily tasks feeling more centered and vibrant. It’s about nurturing your whole self, not just your skin.
Maintaining Your Glow: Post-Facial Care and Routine Integration
Congratulations! You’ve successfully completed your at-home facial and your skin is glowing. But the journey to healthy, radiant skin doesn’t end there. Proper post-facial care and consistent routine integration are crucial to prolonging the benefits and ensuring long-term skin health. Think of your facial as a booster shot for your skin; the daily routine is the maintenance program.
Immediate Post-Facial Care:
- Avoid Harsh Actives: For the next 24-48 hours, it’s generally best to avoid harsh active ingredients like strong retinoids, aggressive exfoliants, or highly concentrated Vitamin C. Your skin has just undergone a deep treatment and might be a little sensitive. Stick to gentle, hydrating products.
- Hydrate Internally: Continue to drink plenty of water. Hydration from within is paramount for skin health and helps maintain the plumpness and radiance you’ve just achieved.
- Sun Protection is Key: Even if you applied SPF at the end of your daytime facial, continue to be diligent with sun protection every single day, rain or shine. Your freshly exfoliated skin is more susceptible to sun damage.
- Clean Pillowcase: Change your pillowcase to a fresh, clean one. This prevents transferring dirt, oil, and bacteria to your freshly cleansed pores.
- Hands Off: Resist the urge to touch your face unnecessarily. Your hands carry oils and bacteria that can irritate your newly purified skin.
Integrating Facials into Your Regular Routine:
- Frequency: Most experts recommend an at-home facial once every 2-4 weeks. This allows your skin’s natural renewal cycle to occur and prevents over-treating. Listen to your skin; if it feels sensitive, stretch out the time between facials.
- Consistency is Key: While facials provide a boost, your daily skincare routine is what truly maintains skin health. Ensure you have a consistent morning and evening regimen that includes cleansing, toning, serum, moisturizer, and SPF (daytime).
- Product Rotation: If you have multiple masks or serums, consider rotating them to address different concerns throughout the month. For example, use a purifying mask one week and a hydrating mask the next.
- Listen to Your Skin: Your skin’s needs can change due to seasons, hormones, stress, and diet. Be flexible with your product choices and adjust your routine as needed. For example, during colder months, you might need richer moisturizers or more hydrating masks.
Regular at-home facials, combined with a consistent daily routine, contribute significantly to overall skin health and radiance. This proactive approach to skincare is a vital component of holistic wellness. Just as you might organize your workspace to optimize productivity by learning How To Set Up Family Home Office, organizing your skincare routine ensures optimal results for your skin. It’s about creating sustainable habits that support your well-being in every aspect of your life, fostering a radiant complexion that reflects your inner health and vitality well into 2026.
Beyond the Facial: Holistic Wellness for Radiant Skin
While mastering how to do a facial at home step by step is a powerful tool for achieving glowing skin, true radiance stems from a holistic approach to wellness. Your skin is a mirror reflecting your internal health, and addressing foundational aspects of your lifestyle can amplify the benefits of any topical treatment. Veralyn Media consistently emphasizes that beauty and health are interconnected, urging women to consider the broader picture of their well-being.
Nutrition for Skin Health:
- Eat a Rainbow: Incorporate a wide variety of fruits and vegetables rich in antioxidants, vitamins, and minerals. Berries, leafy greens, and colorful peppers are excellent choices.
- Healthy Fats: Omega-3 fatty acids found in fish (salmon, mackerel), flaxseeds, chia seeds, and walnuts are crucial for maintaining skin barrier function and reducing inflammation.
- Hydration: Beyond sipping water during your facial, make consistent hydration a daily priority. Water flushes toxins, aids nutrient delivery, and keeps skin plump and supple.
- Limit Processed Foods & Sugar: These can contribute to inflammation and breakouts. Opt for whole, unprocessed foods whenever possible.
Sleep and Stress Management:
- Quality Sleep: Aim for 7-9 hours of quality sleep per night. During sleep, your body repairs itself, including skin cell regeneration. Lack of sleep can lead to dullness, dark circles, and increased inflammation.
- Stress Reduction: Chronic stress can trigger hormonal imbalances, leading to breakouts, increased sensitivity, and premature aging. Incorporate stress-reducing activities like meditation, yoga, deep breathing exercises, spending time in nature, or engaging in hobbies you love. Your at-home facial itself is an excellent stress-buster! This is a core tenet of Womens Health Tips Every Woman Should Know, as managing stress impacts every system in the body.
Exercise and Circulation:
- Regular Movement: Engaging in regular physical activity boosts blood circulation, delivering oxygen and nutrients to skin cells and carrying away waste products. This contributes to a healthy, vibrant complexion.
- Sweat it Out: Moderate sweating can help to cleanse pores, but remember to cleanse your face promptly after a workout to prevent breakouts.
Mindful Product Choices:
- Clean Beauty: Beyond your facial products, extend your mindfulness to all personal care items. Opt for products free from harsh chemicals, synthetic fragrances, parabens, and phthalates, especially if you are considering Fertility Health Tips Women Trying Conceive, as certain chemicals can disrupt endocrine function.
- Sun Protection Daily: Reiterate the importance of daily broad-spectrum SPF as the single most effective anti-aging and skin-health measure.
By weaving these holistic practices into your daily life, you’re not just treating your skin from the outside; you’re nurturing it from within. This synergy creates a lasting radiance that goes far beyond any temporary glow. Making these choices consistently ensures that your skin reflects your vibrant health, not just today, but for many years to come, solidifying your commitment to comprehensive well-being in 2026 and beyond.
Frequently Asked Questions
Recommended Resources
Learn more about this topic in Fashion Trends For Women 2026 at Fashion Goggled.
Learn more about this topic in How To Set Healthy Boundaries In Relationships And At Work at Sometimes Daily.